Have you ever used plastic wrap when you’re carving a pumpkin? Check out how to do it.

If you’ve never used plastic wrap to carve a pumpkin, you have to try. After you find a pumpkin stencil that you like, print, wet and stick. Read on for all of the details. I’ve also included a Free Pumpkin Stencil Printable with over 20 silhouette shapes to carve onto your pumpkin.
Do you want more Halloween fun? This Halloween Activity Packet will make your Halloween Spooktacular. It includes over 25 Printable Activities.

Step 1: Gather all of your pumpkin carving supplies

Here’s your pumpkin carving supply list (This post contains affiliate links to the products mentioned. Read my disclosure policy for more information):
- Free Pumpkin Stencil Printable <–Get it here
- OR you’re own stencil printout (see step 3 below)
- Pumpkin
- Pumpkin Carving Kit – This is the one we used, the little saws are great.
- plastic wrap
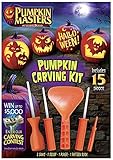
Pumpkin Masters Kit

Step 2: Cut the top off and hollow out your pumpkin

If you’ve ever carved a pumpkin before, you know the drill. The first thing you have to do is get the top off your pumpkin and get all of those pumpkin guts out.

If you’re adventurous, save some of the seeds to cook and eat later.
Step 3: Find an easy silhouette printout
I have a Free Pumpkin Stencil Printable full of silhouettes that are easy to print. If you like any of them, just print the page that you want to carve on your pumpkin and you’re ready for the next step.

If you would like to find your own pumpkin design, just do a google image search for terms like “Halloween silhouette’, “easy cat silhouette” or the one we used was “Minecraft creeper silhouette”. Here’s a list of some searches that give good results:
- jack o’lantern silhouette
- halloween silhouette
- animal silhouette
- dinosaur silhouette
- princess silhouette
- harry potter silhouette
You get the idea, use your imagination you can find almost anything. Just know that whatever is in black is what you will be carving out. So make sure that you steer you kids towards easy to do images.
Once you find the silhouette image that you like, you will need to print it. Here are the steps I take to print an image I find on the web:
- Find the image you want
- Right click on the image
- Click “Copy image”
- Open a blank MS Word Document
- Once you’re in the document, Right click and click “Paste”
- You may need to re-size your image by dragging one of the corners
- When you’re happy with the size, Go To “File” and select “Print”
- Click on the large “Print” square
- And you’re finished
Here’s a short video explaining the steps above (I’m not a Giants fan, it’s just the best/shortest video I could find):
Step 4: Apply the pattern to the pumpkin
Ok, this is the fun and crazy step. You’re going to apply the pattern to the pumpkin so you can easily cut out the shape.
First, wet your silhouette printout. I know, crazy right?! Yes, take the paper to the sink and get it wet. The wet paper sticks to the pumpkin and conforms to the round pumpkin shape. This was a game changer when I learned this step.

Take your printout and apply it to the pumpkin while wet. Try to get it as smooth as possible, but be careful, the paper can rip easily. This is definitely a step for the grown-ups.

Second, while the paper is still wet, cover it with a sheet of plastic wrap. This will hold it in place while you cut. We wrapped our pumpkins twice but later discovered, one layer of plastic wrap works best.

Step 5: Carve your pumpkin
Cut right through the plastic wrap and cut out all of the black parts of your silhouette. It’s best to start in the middle of the design and with the smallest shapes first. We also found that when you cut from top to bottom, that seemed to work best.

There may come a point when the plastic wrap doesn’t stay on or your paper tears. That’s ok, just try to patch it over with more plastic wrap. Also, this is why simple (less intricate) designs work best.

Step 6: Clean off your pumpkin and enjoy
When you’re finished you will need to clean off the remainder of the paper pattern and plastic wrap. Then scrape out any remaining pumpkin pieces from the inside. Add your candle and enjoy.

And you’re finished
Your Jack O Lanterns are sure to be a hit this Halloween. And with a little bit of grown-up help it’s easy for most kids.
More Halloween Crafts
If you liked this pumpkin carving activity, check out some of my Halloween Crafts:


As always, I try to make my crafts fast, easy & inexpensive. Enjoy.
Want to remember this? Post this craft to your favorite Pinterest board
